Conquest Mode has finally arrived in Marvel Snap. The premise of playing multiple games against the same opponent encourages more strategy than a one-off game, and in-turn raises the importance of having a strong deck. The best decks have enough variety that players should have plenty of options, no matter the combination of cards at their disposal and in their hand. One of the best decks in the current meta of Marvel Snap is the Bounce deck.
Bounce decks thrive on an archetype that plays cards and then returns them to the player's hand, to be played once again. At face value, bouncing cards can get multiple uses out of disruptive or useful On Reveal abilities, which can change the landscape of a game in the later rounds. These decks have added flexibility to them, and ultimately a level of location control. A player can cut their losses in one location, and recall their cards to distribute them elsewhere. Bounce decks can be blatantly obvious in revealing their win conditions early on, but remain unpredictable in where the certain cards can be played. As with most archetypes, Bounce decks comprise cards that instigate the bouncing, and those that benefit from being bounced.
Cards That Enable Bouncing
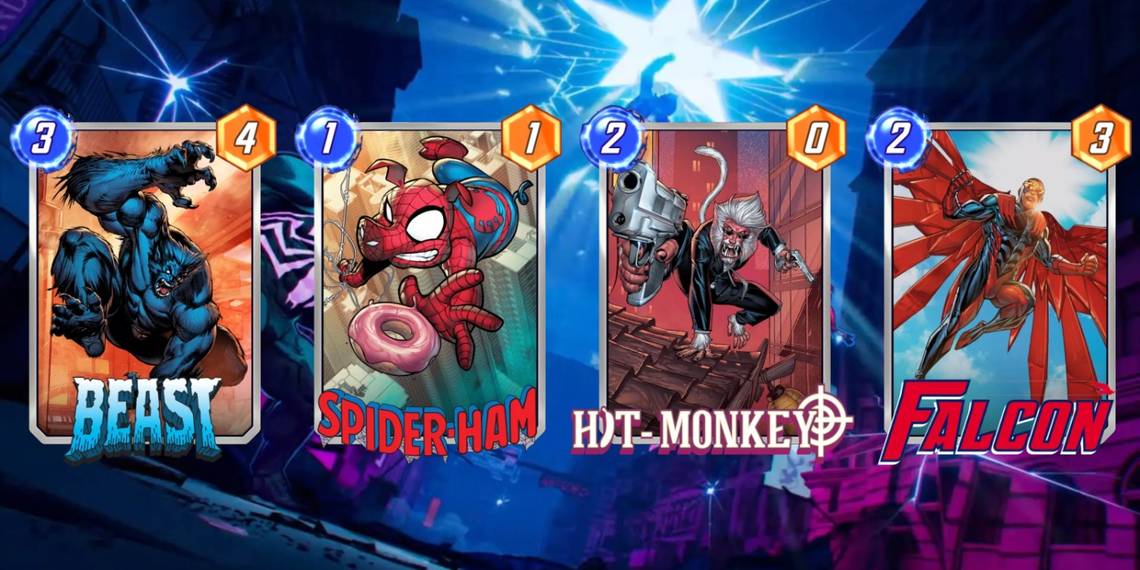
The three Marvel Snap cards that initiate the bouncing for the deck each come with their own unique perks and twist on the concept. Beast is the undeniable highlight of the Bounce deck, and the main reason it works so well. Beast is a 3-Cost 4-Power card that returns all the cards at its chosen location to the player's hand, and they will cost 1 Energy less the next time they are played. Bouncing cards back is a great strategy in terms of location control and maneuverability, but this cost-reduction elevates Beast to a whole new level. Cost-reduction cards like Zabu and Sera can never make a card cheaper than 1 Energy, but Beast puts them to shame. Beast enables some cards to be played again completely free of charge.
Because of how overpowered Beast is, Falcon often gets overlooked. Yet Falcon deserves credit for his part in the archetype — as his On Reveal ability returns all in-play 1-Cost cards to the player's hand. Not only does Falcon recall cards like Spider-Ham to use their On Reveal once again, but he can even clear unwanted 1-Cost cards from any location, including Raptors, Squirrels and Rocks. Kitty Pryde doesn't provide as much of a service as Beast or Falcon, but she ultimately bounces herself. At the beginning of every round that she is in-play, Kitty will return to the player's hand with +2 Power. Kitty can essentially be played on almost every single turn — buffing cards like Bishop, Angela, The Collector, and herself.
Cards That Benefit From Bouncing
There are so many cards that can benefit from Beast's cost reduction that it isn't always easy to just pick 12 cards for the deck. 1-Cost cards like The Hood can be played and then returned, clearing the way for better alternatives that actually provide Power. The Hood's value comes from the 6-Power Demon it produces. However, there are plenty of other 1-Cost cards that can cause mischief when activating their On Reveal ability once again, especially if they cost no Energy the second time around. Spider-Ham, Iceman, and Korg are the main examples of this.
Bounce decks also have cards that actively benefit from other cards being played, from Angela and Bishop, to The Collector and Hit-Monkey. Bouncing these cards back to the player's hand gives them a chance to gain even more Power, which is especially good for Hit-Monkey and Angela. Angela only gains +2 Power when a card is played at the location, so filling up its location and then bouncing back a +6 Angela, gives her the opportunity to gain another 6 Power with the correct application.
Best Bounce Deck List
Energy Cost | Power | Name | Description |
1 | 0 | Kitty Pryde | When this returns to your hand, +2 Power. Returns at the start of each turn. |
1 | -3 | The Hood | On Reveal: Add a Demon to your hand. |
1 | 1 | Spider-Ham | On Reveal: Transform the highest-cost card in your opponent’s hand into a Pig, keeping its Power and Cost. |
1 | 1 | Bast | On Reveal: Set the Power of all cards in your hand to 3. |
2 | 0 | Angela | After you play a card here, +2 Power. |
2 | 0 | Hit-Monkey | On Reveal: Gain +2 Power for each other card you played this turn. |
2 | 4 | Mysterio | As you play this, play Illusions to other locations. Disguise this as an Illusion until the game ends. |
2 | 3 | Falcon | On Reveal: Return your 1-Cost cards to your hand. |
2 | 2 | The Collector | When a card enters your hand from anywhere (except your deck), +1 Power. |
3 | 1 | Bishop | After you play a card, this gains +1 Power. |
3 | 4 | Beast | On Reveal: Return your other cards at this location to your hand. They cost 1 less. |
6 | 9 | America Chavez | Starts on the bottom of your deck. Draw this on turn 6. |
Gameplay Guide
Every game of Marvel Snap is different. The player's opening hand and deck order will rarely be the same, nor will the location combination. Luckily, the Bounce deck is fluid and adaptable. The ideal start for a Bounce deck is to get Kitty Pryde in-play, but any other 1-Cost card will be a good alternative. Bast is an interesting card that can really help in certain situations, as its On Reveal ability turns all cards in the player's hand to 3 Power. The goal is to play Bast early and hit those cards that start with 2 or less Power. Kitty Pryde can get a head start thanks to this extra Power, as can Hit-Monkey, Angela, and Bishop.
Turn 2 should be spent either playing 2 1-Cost cards, or getting an Angela or The Collector into play. Bounce players should look one or two turns ahead, while presuming they will draw Beast or Falcon at some point. If the Collector is in-play early on, he gains +1 Power whenever a card enters the player's hand from anywhere but the deck. This means Kitty Pryde and any bounced card will increase the Collector's Power.
As a 3-Cost card, Beast can be played on Turn 3, but players should aim to get as many cards on the field as possible before initiating the bounce. Angela and a 1-Cost card would be the best scenario, or playing Bishop to benefit from the flood of cards that will be unleashed in the later turns.
Beast and Falcon should be played on Turn 4 or 5, and can even be played together on the latter. If Beast and Falcon are going to be played on Turn 5, then Hit-Monkey and Mysterio is a good combination for Turn 4. Hit-Monkey will get +6 Power thanks to Mysterio counting as three cards, and will have 9 total Power if hit by Bast earlier on. It can then be bounced and reintroduced on the Final Turn. If using both Beast and Falcon, players will need to make sure that they have space in their hand for all the returning cards. They should also ensure that Beast moves first to get the discounted cards.

Turn 6 is huge in a Bounce deck, but players should always be prepared for that classic Marvel Snap issue of RNG and general bad luck. There is a world where neither Beast nor Falcon comes out from the deck, and in that scenario, players need to have a reliable solution. This is where America Chavez steps in. Chavez is the most reliable card in Marvel Snap, since she is a Turn 6 guaranteed draw. She can ultimately be played instead of Bounce flood, or a turn after it, alongside side some 0-Cost cards.
If players can execute their Bounce strategy, then it should be a flood of discounted cards on Turn 5 or Turn 6. Cards like Spider-Ham and Iceman are best used again in earlier turns so that their On Reveal abilities can have an impact, but a late bounce can pour Power onto every location. By the end of the game, Angela, Bishop, The Collector, Hit-Monkey, and Kitty Pryde should all be around 10 Power. If spread sensibly across the locations, Bounce players can overwhelm their opponents.
What Opposing Cards & Decks To Watch Out For
As good as the Bounce deck is in the current Marvel Snap meta, there are other cards and decks to watch out for. Disruptive cards like Sandman and Wave can force the player to only play one card, which disrupts the flow of decks like Bounce and Sera Control. Professor X is also another bane to Bounce's existence, as it narrows the playing field. Spider-Ham may be a fun addition to the Bounce deck, but it can also be used against Bounce decks and even turn the valuable Beast into a useless Pig.
Bounce decks won't usually have Luke Cage protecting them, meaning that they are susceptible to negative Power affliction, which has risen up since introducing High Evolutionary. Despite its weaknesses, Bounce has the potential to compete with considerable Power of its own, if played well.
What Locations To Watch Out For
Since Bounce decks focus on overloading the locations with cards, any location that restricts or shuts off access will be a problem — from Bar With No Name and Sanctum Sanctorum to The Vault and The Sandbar. These locations ruin the full Bounce experience, but they ultimately help Marvel Snap players adapt and learn, hopefully becoming better at the game in the process. Bounce players ultimately want locations that reduce the cost of cards or add Power to those in the hand. But this is ultimately applicable to any deck in Marvel Snap.
Bounce decks may not be for everyone, or even accessible due to pivotal cards like Beast being a late Pool 3 release. However, they are undeniably strong in the current Marvel Snap meta. They are more versatile than Destroy, Move, and Discard decks, and have more Power output than Sera Control. With Second Dinner releasing weekly card nerfs and buffs to go alongside the monthly seasons, the age of the Bounce deck may be fleeting, so players should make the most of it while it's still there at the very top of Marvel Snap.